Network Configuration
Now it’s time to setup the network for your virtual machine.
Windows Settings
Before configuring the underlying networking of the virtual machine, you might want to tweak some settings inside Windows itself.
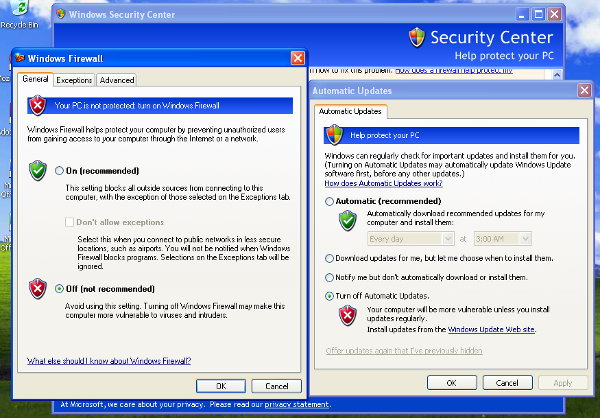
One of the most important things to do is disabling Windows Firewall and the Automatic Updates. The reason behind this is that they can affect the behavior of the malware under normal circumstances and that they can pollute the network analysis performed by Cuckoo, by dropping connections or including irrelevant requests.
You can do so from Windows’ Control Panel as shown in the picture:
Virtual Networking
Now you need to decide how to make your virtual machine able to access Internet or your local network.
While in previous releases Cuckoo used shared folders to exchange data between the Host and Guests, from release 0.4 it adopts a custom agent that works over the network using a simple XMLRPC protocol.
In order to make it work properly you’ll have to configure your machine’s network so that the Host and the Guest can communicate. Testing the network access by pinging a guest is a good practice, to make sure the virtual network was set up correctly. Use only static IP addresses for your guest, as Cuckoo doesn’t support DHCP and using it will break your setup.
This stage is very much up to your own requirements and to the characteristics of your virtualization software.
Warning
Virtual networking errors! Virtual networking is a vital component for Cuckoo, you must be really sure to get connectivity between host and guest. Most of the issues reported by users are related to a wrong setup of their networking. If you aren’t sure about that check your virtualization software documentation and test connectivity with ping and telnet.
The recommended setup is using a Host-Only networking layout with proper forwarding. More on such network routing can be found in Per-Analysis Network Routing, which is part of the host machine setup.